I do not understand why they go to all the trouble to make the crust, heat the oil, put in the filling, fry and then glaze them and yet put a sub-par filling inside. You heard me, sub-par. I would say gross, but my husband thinks they are pretty good. But, and you are not going to believe this, the ingredients actually have jello and koolaid as ingredients! You see what I mean when I say gross. I think they just use pre-packaged filling--UGH.
At any rate, when Bob saw the pie wagon his eye lit up, so I said, "I will make you good ones when we get home." Why do I say stuff like that? Well, we found some amazing peaches at the fruit market and we carted a bushel of them home. We ate a bunch--our whole family ate a bunch--and then I decided I would try my hand at making fried peach pies.
It was hard to find a recipe for fresh pies, so I improvised and they turned out delicious. I sort of combined 3 different recipes, so before I forget what I did, I decided I would blog about it so I could replicate it again.
Fried Fresh Peach Pies...
[Yield about 14-16 six inch pies]
First make the filling. It is best to make it and then cool or chill it because if you put hot filling on raw pie crust, it might melt it and then the filling will run out into the hot oil. Not good!
Filling [Make earlier in the day and cool or chill]:
- 4 C fresh peaches, peeled and sliced.
- 3 T flour
- 1/4 tsp ground cinnamon
- 1 tsp lemon juice
- 1/4 tsp ground allspice [if you have it, if not, add 1/4 tsp more cinnamon or nutmeg]
Pie Crust [my favorite recipe from my friend Linda. This will make 4 pie crusts for regular pies. It will make enough crust for about 16 fried pies]
In a large mixing bowl combine:
- 3 C flour, don't sift
- 1 tsp salt
- 1 C butter, cold and cut into pieces--I only use real butter
Cut in butter till it is incorporated and looks like coarse cornmeal. You can use two knives, a pastry cutter, or my favorite, low speed on a Kitchen Aid mixer.
Mix in separate bowl: [I whipped it all together with a wire whip]- 1/2 C ice water
- 1 egg, beaten
- 1 tsp vinegar
Make a well in the center of the flour mixture; pour in liquid and mix together with a fork until it forms a ball. Knead about 20 times. Separate into 4 balls and cover with plastic wrap until you are ready to use it.
NOTE: This is my absolute first choice for a crust. It is very easy and the amazing thing is the crust is easy to roll out, very elastic. This makes for an unbroken crust so you don’t have the problem of the filling oozing out under the crust into the pie pan or into the oil when you make fried pies. Since I have gotten this recipe I will never go back to my old recipes. To use this for regular baked pies, after rolling it into 4 balls, you can use now or flatten balls a little and freeze in Ziploc bags. To use, let thaw on counter about a half hour and roll out with a bit of flour.
 Now you are ready to make the pies. Heat at least 3-4 inches of oil to 375 degrees. While heating, roll out one of the balls of dough so it is thin. I like to put flour on my counter top and roll right on that, but a pastry board or large cutting board would work well too.
 Get a saucer or little dessert plate, about 6 inches in diameter and lay on the dough and then using the back side [not sharp] of a knife trace around the plate to cut the dough into a circle. Put about 2-3 T of filling in the crust and then [and this is the secret that made all the difference between success and failure] take a pastry brush and lightly brush water on all the edges of the pie. Then flip one side over to meet the other and seal the edges. [As a note each ball of crust should make 4 pies, using 6" circles. I had to cut out two circles, then reform the crust, roll out and cut out another one, then re-roll out again to get the last circle.]
I purchased a little plastic pie sealer and it worked amazingly well. I floured it first and then laid the round pie crust in it, put in the filling, wet the edges, folded over the dough and pressed down. It worked well, but you could just take a fork and press it all along the edges and that would be fine too.
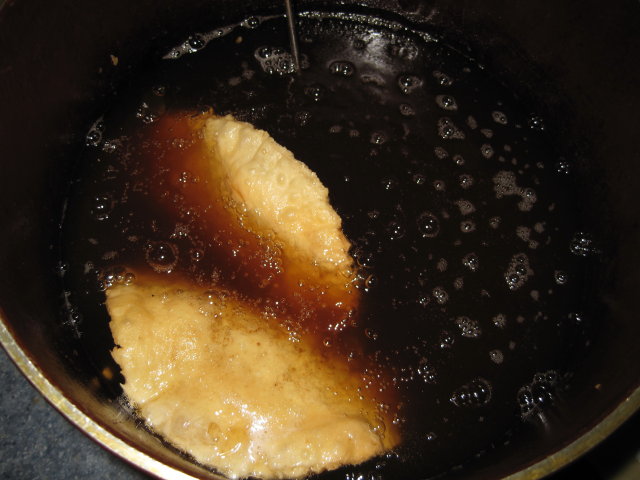
Then just drop the pie in the oil and turn it once or twice till it is evenly light brown. This took about 4-5 minutes and I fried about 2-3 at a time.
 When done, remove from oil and drain on paper towels for a minute or two. We liked them best with a bit of cinnamon and sugar sprinkled on them. I dipped some in a thin powdered sugar glaze [basically powdered sugar with enough milk to make it pourable]. Either way they are amazing, but the glaze is messier to make. I put them on a wire rack when I was done so they could cool a bit.
You could use other fruit as well, but I think peach pie is my favorite.
If you want to make dried fruit pies, you basically do the same thing, but to make the filling, place 3 cups dried fruit [apples, peaches, apricots] in a large sauce pan. Toss with 3 T flour and then add 1 1/2 C water. Bring to a boil and simmer for 30 minutes. Cool and mash slightly and stir in 1/2 C sugar, 1/4 tsp ground cinnamon and 1/4 tsp ground allspice. Set aside to cool a bit and then continue on as in fresh fried pie recipe.
Let me know if you try these and how they turn out. We all thought they were incredible. I think the next time I make them I will make the crust a day or so before and put it in the fridge, each ball in a small Ziploc. Then I will just take them out about an hour before I am ready to use them. I think making the filling a day earlier would be nice too, then all I will have to do on pie-day is assemble and fry.
Take care,
Jill
A little note: I made some fried apple pies today and adjusted a few things. To cut the pies out I used the lid of a 2 quart pot that was about 51/2" in diameter. If you have a pot lid between 4-6" in diameter, try using that. It is much easier than cutting around a small dish. I put in 2T of filling and fried as I describe above.
The filling I used was good: I combined and cooked over slow heat till the apples were soft:
4 cups chopped apples [peel first]
1/2 C brown sugar [could use white]
1 tsp cinnamon
dash nutmeg
When they were soft I stirred in 1 T flour to thicken. Then I cooled it and used as the filling. Makes 16 pies.